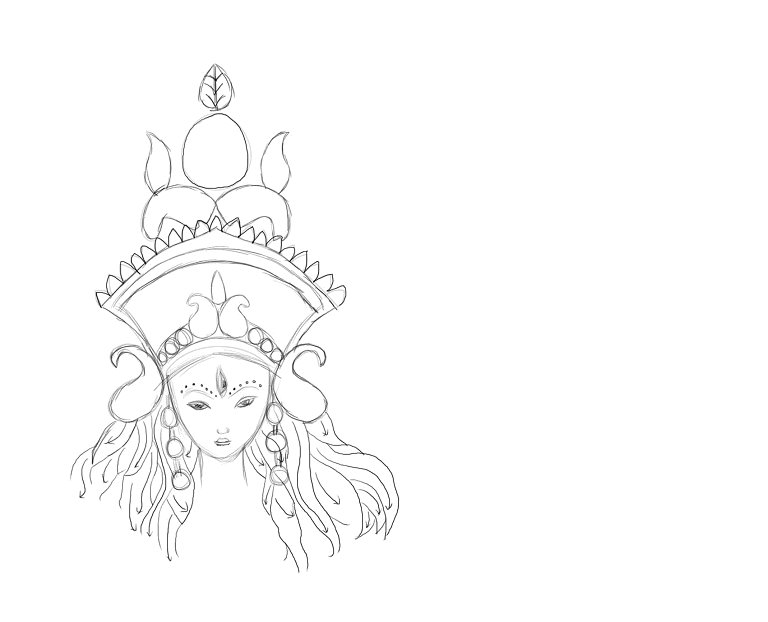
A rough sketch
While making “maa durga” I first made the face and after that I sketched the hair, it has been done strand by strand, yes every single hair strand is sketched. Ok, don’t worry it is not at all tough, in fact it is quite very simple, u just need to keep a few things in mind:
1) the hair style u want to sketch
2) the flow of hair
3) the width of hair strands
4) the thickness of hair
5) the type of hair
6) hair is oily or not
don’t worry friends these are just a few details u need to take care of ok you must b wondering why did I mention oily hair, well friends if the hair is oily it will have lesser volume and high secular hotspots and if the hair is dry it’ll have more volume and low shine. See is that tough to remember? These are day to day life stuff that we don’t observe, the key is observation. These figures will elaborate the above points.
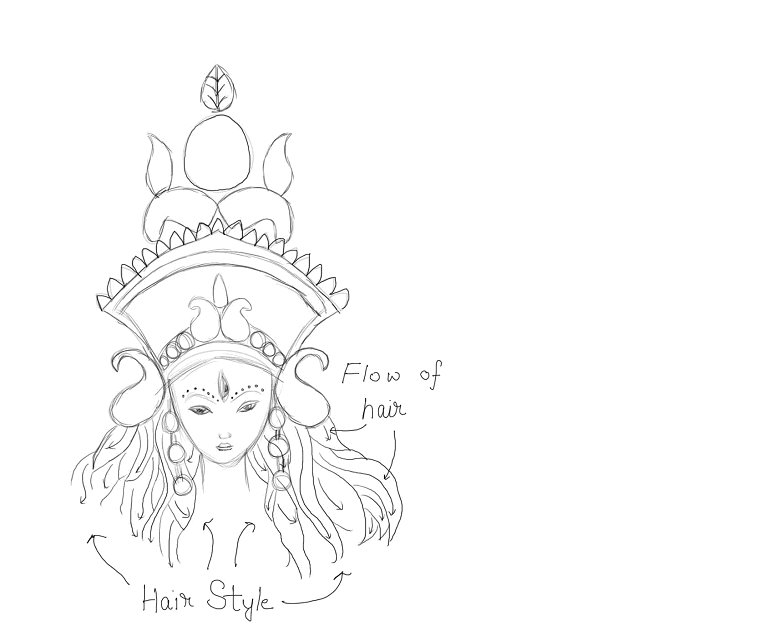
The key to drawing hair is to draw the hair strands first and then mark the flow of hair once you are over with it just paint strokes in the direction of flow, remember never keep the strokes straight it will give the hair a flat look like 2 dimensional, keeping your strokes in a curve will give them a natural look and hence it will look 3-d. I will cover making hair in detail in later tutorials.
Now let us start with the digital painting, I assume that till now we have made the rough outlines and cleaned up the sketch. Now, the concept of shading comes. What is shading? What are shades? Is it necessary? These are a few questions that should pop up in your mind instantly whenever you hear a new terminology, ask a lot of questions, that’s how you can and will learn. So where were we…yes we were at shading. Well friends all of you must have had read comic books for example take “CHACHA CHOWDHRY” you must have seen the art work in the comic its so simple, just a plain colour, well that’s not shading. Shading is done to give a character 3-d look so that you can perceive the depth and bumps on the surface of the object. Ok…now the million dollar question is “how the hell are we going to do the shading”, well my dear cute friends (I hope u all r) to start with shading we must keep in mind three things:
1) Shadows,
2) Mid tones and
3) Highlights.
Shadows
Shadows are the region where the light cannot reach and hence it is a dark region. All of you must have seen shadows, for those of you who haven’t well at about noon stand under the sun and look beneath you…bad joke sorry friends.
Mid tones
Mid tone is the basic colour that is spread all over the surface
Highlights
Highlights are the region on the surface that is exposed to direct light and is generally lighter and brighter in colour. This is the region that has spotlight reflection or specular reflection, but the type of reflection specular or diffuse depends on the nature of the surface. We will study that sometime later, its good to discuss things in an order so that my dear friends don’t get confused.
It’s the turn of the crown TOPOR (Bengali word for that, I’ll use this only)
Well for the topor you’ll have to study some references of maa durga’s topors, I made a very simple one with not much detail, just a simple one, because when I made it, it was just an attempt to do something with the newly bought graphic tablet. But the important thing here is the shading I have done to give the topor a 3-d look and for that I have to again explain the shadow-light distribution on a metal ball
Now for example human skin:
Start with the sketch, fill the area to paint with mid tone and then start painting shadows and highlights. That’s all we do in digital paintings, well obviously its very basic stuff till now. We will discuss advanced things too, but not now. We will move in a sequential manner so keep your questions in your mind and they shall be answered.
The key to shading is the opacity and the flow of your brush and one more thing keep the air brushing on. See, I am not talking in terms of Photoshop or Corel or any other software, remember this thing my friends it’s not the software that makes the digital painting nor is it creative, the ones who make the paining is us, we are the creative ones. Softwares are mere tools it’s up to us how skillfully we use them.
Let’s start with the “MAA DURGA” digital painting
To start with I first made a rough outline of maa durga, which I later cleaned up. Now the hair part comes, as I described earlier we first have to sketch the flow of hair and after that the strands and then start paining hair, if u follow this step by step, creating hair is a piece of cake(black forest) friends. So the below figures will illustrate my methodology
Now here you can follow step-by-step images :

Rough Sketch
Clean Up
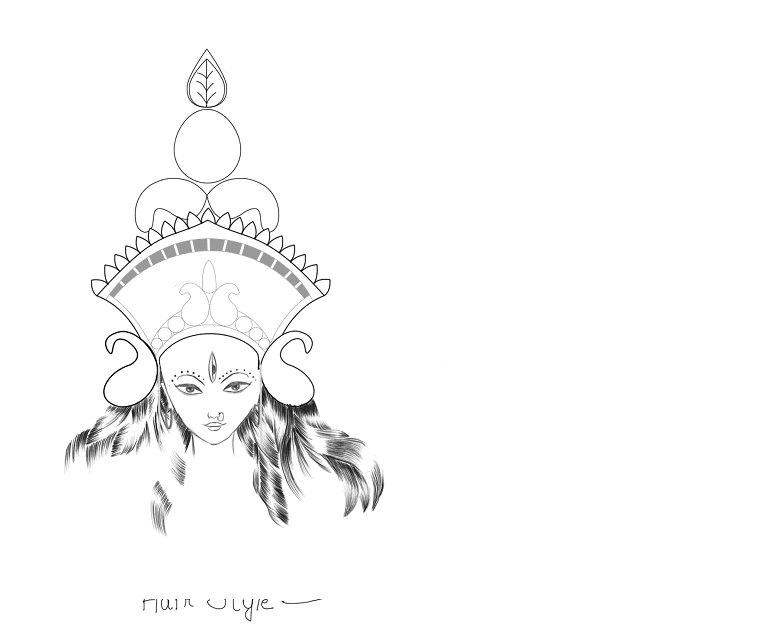
With Hair

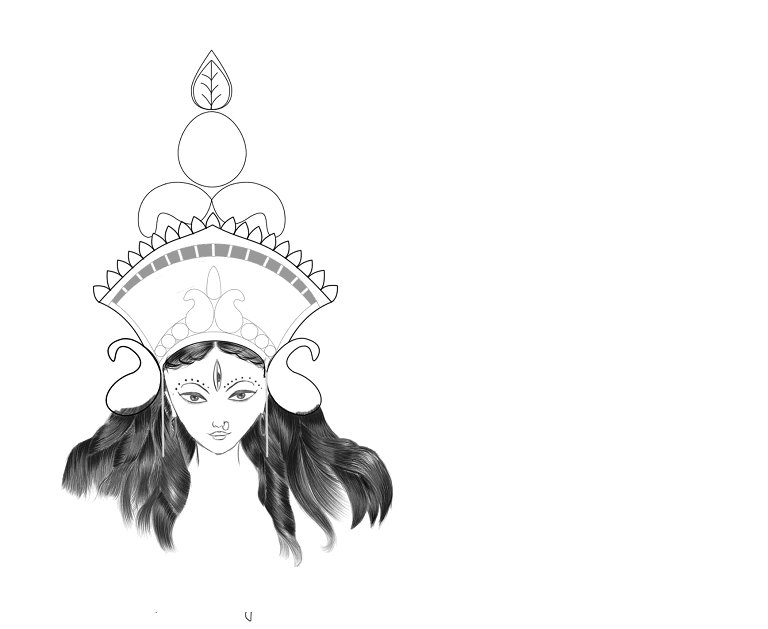
Full details and basic shading

Full shading

Giving it a Bengali touch (I can’t help it friends, I am one too)
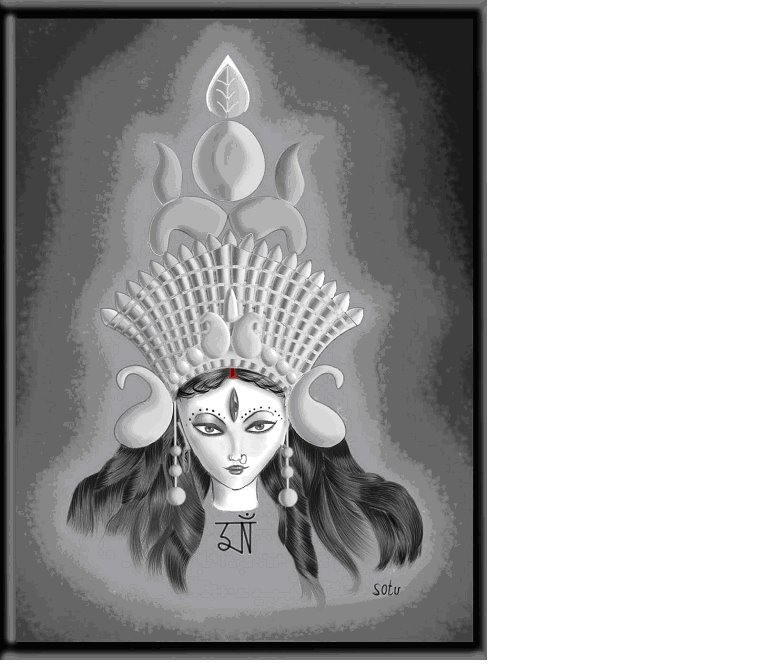
Adding the background and the final painting
4 comments:
thanx for such a gr8 start. keep it up
its really a nice post...keep it up
Thanks a lot for sharing this great piece of art with us and the step by step procedure of creating it!!!
Very generous of you metalloid to share your knowledge with us!!!
Keep inspiring!!!
BEWTIFUL
Post a Comment